|
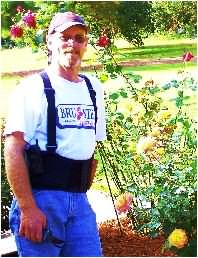
Featuring
Gary
Mueller - Rose Expert |
At
Wilson Bros, we know quite a
bit ourselves about growing
roses. We are more than happy
however, to acknowledge the
high level of expertise that
someone such as Gary Mueller
has achieved in growing absolutely
flawless, florist quality hybrid
tea roses. Those of you who
frequently visit the nursery
may have seen Gary's perfect
roses on display at the front
counter. We asked Gary if he'd
be willing to give us, and you,
his secrets and he gladly obliged.
Ask
Gary Your Rose Gardening Question
Gary's
Rose Winterization Tips |
|
Growing Roses the
Mueller Way
By: Gary Mueller
Getting
Started -
Getting started right is very important.
Choosing and preparing a good site is necessary
for growing good roses. First, I pick a
location that will recieve plenty of morning
sun. Roses like the sun, and the morning
sun will help dry the dew off of the leaves.
Roses like at least 6 hours of sun a day,
however, can tolerate all day sun. Always
make sure to space your roses properly for
good air circulation which helps to prevent
fungal problems later in the season. I have
hybrid tea and floribunda roses and plant
them about 4’-5' apart, or more.
Testing your soil for pH is also important.
Ideally roses like the pH to be 6.0 to 6.5.
In this slightly acid range, most of the
nutrients that roses need are readily available.
You can raise your pH by broadcasting lime
and working into the soil. If your soil
is too alkaline, you can lower the pH by
broadcasting agricultural sulfur and working
into the soil.
There
are two types of roses available: container
grown, and bare-root roses. There are different
ways to plants these two types of roses.
From mid-March to Mother's Day, Wilson Bros.
Nursery has a good selection of 3 gallon
size container grown roses that are either
in bud or bloom, making the selection process
a little easier. Bare-root roses are available
for purchase by mail order catalogs or various
sites on the internet.
Planting
Container Grown Roses
STEP
1 -
To plant a container grown rose, dig a hole
at least 24" deep, and 12” wider
than the container the rose is in. This
will give the roots plenty of room to start
growing through ammended soil.
STEP
2 - After you dig your hole fill
it half way with water and let the water
soak in. The water should empty the hole
within an hour, and if not, dig the hole
a few inches deeper. Roses do not like wet
feet, and if their roots stand in water
for long periods of time root rot will occur.
STEP
3 - I have a soil mixture recipe
for planting roses. After digging the hole
for my rose, I mix in:
-
a shovel full of peat moss
- a
shovel of dried cow manure
-
a shovel of compost such as Mushroom Compost
-
1 cup of cottonseed meal
-
1 cup of bone meal
-
1 tablespoon of Epsom salts.
Mix
these ingredients together with the native
soil dug from the hole.
STEP
4 - Before placing the rose in
the hole, backfill hole with soil mixture
to a level where the top of the rootball
of the rose will be slightly above the ground
level. Place the rootball in hole making
sure that the top edge is even with the
ground level. While holding the rose steady
to keep it straight, backfill with the soil
mixture to a level 3/4 of the way to the
top of the hole tamping lightly as you go.
Add water to settle and remove any air pockets.
I then add some fish emulsion for an extra
boost.Ffollow instructions on the product
label. Finish backfilling making sure not
to put any mix on top of the rootball.
STEP
5 - Build a 2" high catch
basin to help retain water during the first
season by mounding a ring of soil in a circle
around the perimeter of the hole.
Planting
Bare Root Roses
STEP
1 -
After recieving your roses make sure to
soak the roots for 6 to 24 hours in water
to restore the moisture lost during transport.
STEP
2 - Dig the hole for your bare
root rose 18" to 24” across,
and deep.
STEP
3 - Fill hole with water and make
sure it soaks in within an hour. If the
hole does not drain properly dig a few inches
deeper. The hole should be wider than the
diameter of the root system when spread
out.
STEP
4 - Use the same recipe for your
soil mix as with container grown roses.
STEP
5 - Next, shape a mound of soil
mixture in the bottom of the hole, high
enough so that the bud union or crown will
be at ground level when planting. Mix a
1 gallon solution of root stimulator and
water, following instructions on the product
label for mixing. Place the rose in the
hole and pour the root stimulator solution
over the roots. While holding on to the
rose to keep it straight, and at a level
where the bud union is slightly above ground
level, backfill hole with soil mixture to
a level 3/4 of the ways to the top of the
hole, lightly tamping as you go. Add water
to settle in and remove any air pockets.
Continue backfilling making sure the bud
union is slightly above ground level.
STEP
6 - Build catch basin for retaining
water as described in Step 5 above for container
roses.
Watering
- Roses
planted in well-drained soil as described
above appreciate frequent watering during
dry spells. If you follow the planting instructions
as described above poor drainage will not
be a problem. Under normal conditions, roses
need 1” of water per week from rainfall
or other sources. Many roses will tell you
when they need watering. Drooping new growth
is an indicator. I have a drip system running
through out my rose garden. I water my roses
with 2 gallons of water every other day.
Attaching a water meter to your spicket
helps to measure the amount of water despensed.
Do not water during the hottest parts of
the day. Instead, water early in the morning
or late in the afternoon. If you hand water
your roses make sure to avoid splashing
water on the foliage as this may promote
black spot on the foliage.
Fertilization
- I
fertilize my roses when they begin to show
new growth in the early spring. I use a
Rose Fertilizer that also contains a systemic
insecticide. Fertilome Rose Food with Systemic
Insecticide is a good choice. Broadcast
around the root sytem and gently work in,
making sure not to go to deep as the roots
could be damaged. I fertilize every 6 weeks
with the fertilizer plus systemic insecticide.
In addidtion, every two weeks I water around
the base of each of my roses with a solution
of 1 tablespoon Miracle Gro for Roses fertilizer
in 1 gallon of water. I use old milk jugs
to make it easier to measure and distribute.
Disease
Prevention & Control
-
I
always keep a chart of when I spray my roses
with fungicides. You should spray your roses
with a fungicide on a schedule of every
10 to 14 days. This is easy to do if you
keep a sprayer on hand that is specifically
for fungicides. I alternate using a different
fungicide every other week to make it less
likely that the my roses will become tolerant
to one fungicide. If any leaves on your
roses develop black spot, or start to turn
yellow from a disease, pull them off and
discard them. Any diseased leaves that have
fallen to the ground should also be removed
and discarded. The onset of black spot is
usually caused by too much water on the
leaves, or during extended overcast periods
when the dew is not dried off by the sun.
I use Manzate to kill black spot spores.
If black spot spores are present, you must
first eliminate them by picking diseased
leaves off. Good air circulation also helps
to prevent mildew and other diseases by
keeping the plant dry and not allowing disease
spores to take hold. Aside from manzate,
the other fungicides I use are Compass and
Banner-maxx. These are quite expensive chemicals,
however the the bottle goes a long way because
of the small amount needed to mix solutions.
Wilson Bros. Nursery sells a couple of cheaper
fungicides including Fertiliome
Liquid Fungicide that will
work if the more expensive ones do not fit
your budget. For those of us who want to
use an environmentally safe fungicide and
disease control, Safer Garden Fungicide
is an excellent alternative and also available
at the nursery.
Insect
Control
- I
only use pesticides when there are insects
present. (Always follow direction on the
product label before mixing or applying
insecticides). Most insects can be controlled
with pesticides, however, certain insects
such as spider mites will require a miticide.
If you have identified spider mites they
will need to be sprayed in stages The first
treatment will kill the adults, and the
second kills the hatchlings. For a general
insecticide I use Orthene but for spider
mites I use Avid along with a modifying
biochemical (sex attractant pheromone),
called Stirrup-M. I also add a product called
Indicate to my water to create the optimal
pH 6.0 – 6.5 in your water along with
a sticker to help it adhere to the leaves
better. Malathion and Liquid
Sevin (Carbyrl) is a cheaper product that
may also be used for mites and various other
insects and is available at the nursery.
I use Merit for Japanese beetles; it is
one of the best. Liquid Sevin also works
well for Japanese Beetles. For best results
in controlling these pesty beetles you must
coat the top and bottom of the leaves. For
those who want to use an environmentally
safe insecticide for insect control, Safer
Insecticidal Soap is a good alternative
and also available at the nursery.
Pruning
- When
winter has arrived, and after we have had
a few hard freezes (28 degrees or so), cut
back long canes that extend beyond the rest
of the bush to make the plant even. Then
tie twine around the remaining canes to
hold the plant gently together. (Do not
cut the bush back completely at this time.
Late February or early March is the best
time to do the heavy pruning. Clean the
ground of all leaves and cover the bud union
with compost or mulch, to help it through
the winter. When the plant goes dormant,
usually around mid-December, spray your
roses with a dormant rose spray. I spray
with Volck Oil and Lime Sulfur dormant disease
spray. It should be sprayed on the ground
under and around the rose bush as well.
A second spray of Volck Oil and Lime Sulfur
in late January or early February can be
of great benefit in controlling such insects
as scale, and some of the fungi that plague
roses. Then, in early spring, when the new
growth begins to emerge, it is time to prune
your roses. The first step in pruning any
type of rose is to remove any dead, damaged,
diseased, or weak and thin canes, cutting
them off flush with the bud union. Remove
any canes that are growing into the middle
of the bush or are crossing one another.
Always prune to an out-ward facing bud so
that canes do not grow into the center of
the plant. The ideal angle is 45-degrees,
slanted parallel to the direction of the
bud growth. Below are instructions for pruning
many types of bush-form roses.
Click
Here for step-by-step instructions for pruning
roses
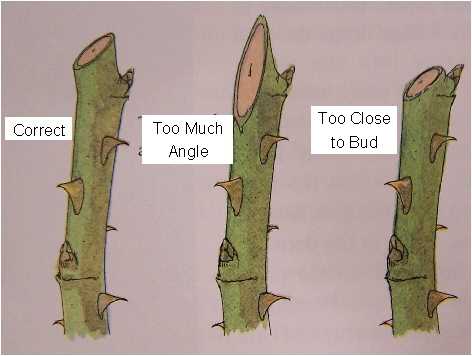
| Pruning
Hybrid Tea Roses During the Bloom Season
- During
the bloom season it is only necessary
to prune away faded or finished blooms.
Simply trace from the spent bloom down
the stem until you come to the first
five-leaf branch. Once you have located
the first five leaf branch make your
cut about a half inch or so above the
bud that is nestled at the base of the
five-leaf branch as shown in the diagram
below. Do not cut too close to the bud
or at too sharp of an angle. |
Mulching
-
Mulch
is a layer of natural material that
is placed atop the soil to blanket
the root sytems from the cold temperatures
during the winter months. It can
be pine needles, wheat straw, or
wood mulch. Applying mulch also
helps to keep the ground moist and
weeds to a minimum.
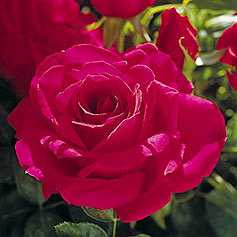
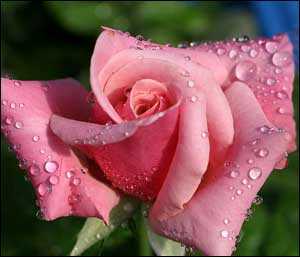
Rose
Varieties
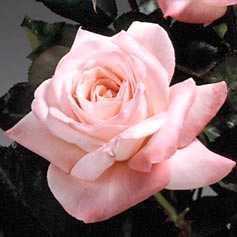
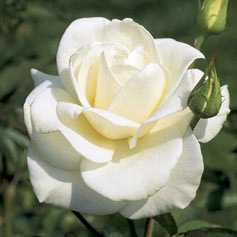
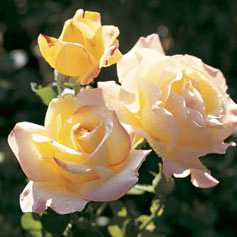
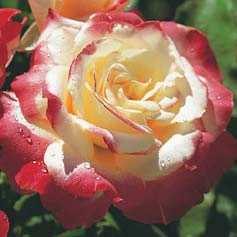
Hybrid
Tea
- The
hybrid tea roses are the best, and
most popular for cut flowers. Most
produce fully double flowersatop
tall single stems, but an occasional
double or cluster. Below are a few
of the hybrid tea varieties.
| |
|
|
|
|
|
|
 |
|
 |
|
 |
|
 |
Barbara
Bush |
|
Ingrid
Bergman |
|
John
F. Kennedy |
|
Peace |
| |
|
|
|
|
|
|
 |
|
 |
|
 |
|
 |
Midas
Touch |
|
Double
Delight |
|
Voluptuous |
|
First
Prize |
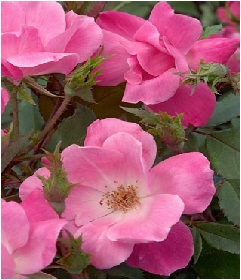
Low
Maintenance Shrub Roses
- Shrub
roses range in size from 2’
to 5’ or higher, and 4’
to 5' wide. They are hardy and easy-care
plants that do not require much
attention. The Knock Out Roses produce
an abundance of single single flowers
from April to November on 4' high
by 4' wide bushes and are the most
disease resistant roses on the market
today. Anybody can successfully
grow these beauties. Several other
new varieties, also pictured below,
have arrived on the scene as well.
 |
|
The
Knock Out Rose is the most disesse-free,
low maintenance shrub rose we
have come across ever! In phases,
masses of cherry-red flowers
are produced from April to November.
We planted the first Knock Out
in our trial garden in 2002
and since then the foliage has
shown itself to be virtually
disease free. We have yet to
spray them. A rose we would
recommend to everybody and therefore
a Wilson Bros. Favorite! |
|
|
|
|
|
|
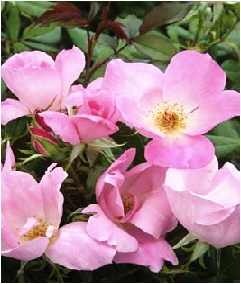
Knock
Out Pink, Blush, and the
2006 New Introduction
'Double Knockout' (pictured
left) are three more recent
introductions having the
same disease-free qualities
as their brother, Knock
Out Cherry. |
|
| |
|
|
 |
|
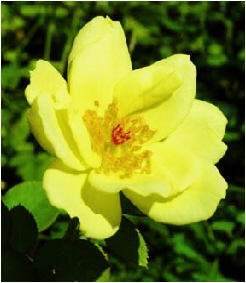
Another
fabulous 2006 New Itroduction
from William Radler, the famous
breeder of the award winning
Knock Out®. Clear yellow
blooms appear in abundant clusters
from spring until fall. These
non-fading blooms survive even
the hottest of summers. This
beautiful rose is virtually
maintenance free. Another rose
you won't want to be without!
|
|
|
|
 |
|
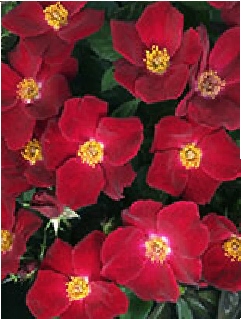
This
flame-red offspring of the famous
Knock Out kicks the competition
up a notch when it comes to
disease resistance. Home Run
has a phenomenal fortitude against
the dreaded black spot (like
its father). But, unlike Dad,
it is also completely resistant
to powdery mildew & has
a much higher level of tolerance
to downy as well. Rounded, bushy,
fast-to-flower and nearly always
in color (10 months), it hits
a grand slam in the landscape
& scores lots of points
in a pot, too. |
|
|
|
Grandiflora
Roses - Grandiflora
is a cross between a hybrid tea
and floribunda. The grandiflora
inherits the best of both parents.
The hybrid tea side of the cross
contributes high-centered flowers
and long cutting stems. The floribunda
side provides hardiness, continual
flowering and clustered blooms.
Grandifloras are generally the tallest
of the modern roses (except for
climbers). You would want to put
them in the back of a bed as a border
or screen.
Floribunda
- Just
as the name suggests, the floribunda
has an abundance of flowers. The
floribunda was crossed from hybrid
tea and a polyantha, and often has
hybrid tea-type flowers, although
not always. The floribunda tends
to be hardy ad low growing, and
produce flowers of varying size
and color in sprays all summer.
The low, bushy form of floribundas
make them excellent plants for landscaping,
especially as hedges, or mass plantings.
Miniature
- Miniature
roses are just like other roses
but miniature in form, leaves, stems,
and flowers. Miniature roses are
easy to grow in any garden, indoors
or out. Miniature rose height ranges
from 3” to 4” to 3’
to 4’ in height, and have
flowers that range from less than
an inch to several inches across.
They come in a wide range of colors
and petal shapes.
Climbing
- The
long canes of climbing roses can
be trained to grow on trellises,
fences, arbors, pillars, or other
structures. Climbers are non-clinging
so must be tied to their supports.
Climbers range from 6’ to
14’ high or taller.
Tree
- Tree
roses are roses that have been grafted
to be standard (single Stem) trees
at heights of 36” or 24”.
Tree roses may be planted in the
ground or in pots.
Groundcover
- Groundcover
roses are great for slopes, embankments,
or to grow up chainlink fences.
They grow approximately 1’to
2’ high to up to 6’
wide or more.
English
- English
roses are usually very fragrant
roses and most of them are quite
disease resistant. The range in
height is from 3’ to 6,’
with some growing higher. Many english
roses bloom only once or twice a
season, however many are continual
bloomers through the season. The
blooms of English roses can have
over 100 petals!
|
|