 |
|
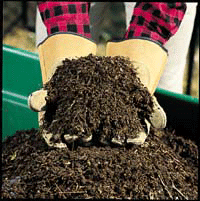
Veteran gardeners
swear by compost. It's unrivaled
for adding readily available
nutrients and beneficial bacteria
to vegetable garden soil, or
adding to the mix when planting
shrubs, trees, perennials, annuals,
and container plantings, promoting
healthy and vigorous growth
of plants. Plus, compost is
an envioronmentally smart way
to turn houslehold food waste
and vegetative landscape and
garden waste into something
besides a bulge in your garbage
bag. |
If your the lazy and patient type
creating compost is nothing more
than piling up leaves, clippings,
kitchen scraps and other materials
into a heap, and waiting for it
to ferment. But, if you have an
aesthetic sense (or a spouse with
a shred of dignity), building or
buying a compost bin is in order.
A list of links to websites that
offer compost tumblers can be found
at the bottom of this page. These
tumblers provide you with rich compost
within 14 days!
Here's a list of
what you might need if you decide
to build a wooden or wire-mesh compost
bin:
- 4 pallets for
sidewalls (usually can be found
at hardware or building supply stores,
grocery stores, or garden centers)
- or - you can buy 1"x6"
lumber at your local building supply
center (make sure to buy cedar or
cypress as it hold up longer) -
or, for wire sides, about 16-20'
of 3' height wire hardware cloth
- 4 corner posts
(treated landscape timbers work
good and are cheap) - Fenceposts
work good too
- Nails or wire
to attach the sidewalls to the posts
- Metal hinges or
latches for the removable wall (One
wall needs to be removable for access
to 'turn' the compost from time
to time.
- If you are extremely
aestheticaly conscious, and money
isn;t too much an issue, than build
your bin with motar blocks, and
brick or stucco the sides!
STEP 1 - Choose
a level site that is preferably
shady, has good drainage, and is
easy accessible.
STEP 2 - Install
the 4 corner posts, which should
be about 4 feet in length, at 3-4
foot apart in a square. Dig holes
with post hole diggers to a depth
of 12" so that 3' of the post
will be above ground. Place post
in hole and backfill with soil tamping
as you go. (you may backfill with
Sakrete if you like however it is
not necessary).
STEP 3 - Attach
pallets, boards, or hardware cloth
to three sides with nails or wire.
Attach 4th sidewall with hinges
or latches so that it will be removable.
If using 1x6" boards leave
small gaps between so that the pile
can breath. This helps speed up
the composting process. Don;t worry
about adding a top, rain helps speed
up the composting process.
STEP 4 - Add about
a foot or so of leaves, lawn clippings,
shredded paper, cow or horse manure
and other composting material you
can find to begin the composting
process.
STEP 5 - After about
3 weeks turn the mixture good with
a shovel or pitchfork. Throwing
in some fertilizer doesn't hurt.
Do so again about every 2 weeks
or so. If the mixture seems to dry
hose it down. When the matter is
uniform brown, crunbles, and is
odorless it is ready for use in
the landscape or garden.
Composting
Compost is an excellent source
of organic material for your garden.
It has the added benefit of reducing
the amount of waste your household
generates. All organic kitchen and
garden waste except animal products
can be composted. Material such
as bones and animal scraps should
be avoided because they attract
vermin, flies, and scavenging animals.
Begin the compost by adding 12
inches of organic matter (kitchen
scraps, yard waste, etc.). Then
apply 1 to 2 pounds of high-nitrogen
organic fertilizer such as dried
blood, guano, or poultry manure.
Finally, add 2 inches of soil. Continue
building the compost pile in this
layered fashion as you generate
organic matter. The center of the
pile should be concave to hold rain
water. The center of the pile should
begin to heat up within a couple
of weeks. The composting process
should be complete within two to
three months, depending on material
and outside temperature.
Large material such as tree limbs,
corn stalks, etc., should be chopped
into smaller pieces to facilitate
decomposition. Some materials, such
as lawn clippings, will decompose
very rapidly; others will require
turning the compost pile (which
aerates the pile) and adding more
high-nitrogen organic fertilizer.
This will restart the heating and
decomposition process.
If all this seems
to much work and you'd rather spend
your time in the garden doing other
things, just buy a Spinning
Composter tumbler!
 
Spinning
Composter Compact
enough to store on a balcony
or patio our Spinning Composter
is the ideal choice for
urban settings. Manufactured
of 50% post-consumer recycled
plastic, it produces up
to 85 pounds of rich, fertile
compost in as little as
30 days without odors. Removable
base collects water dripping
from the compost pile to
provide a nutritious byproduct
for gardens and plants.
Eight built-in rollers spin
with minimal effort to mix
in oxygen and speed decomposition.
More about the
Spinning Composter 
|
|