| |
| |
|
|
 |
All
About
Spring
Bulbs |
|
| |
|
|
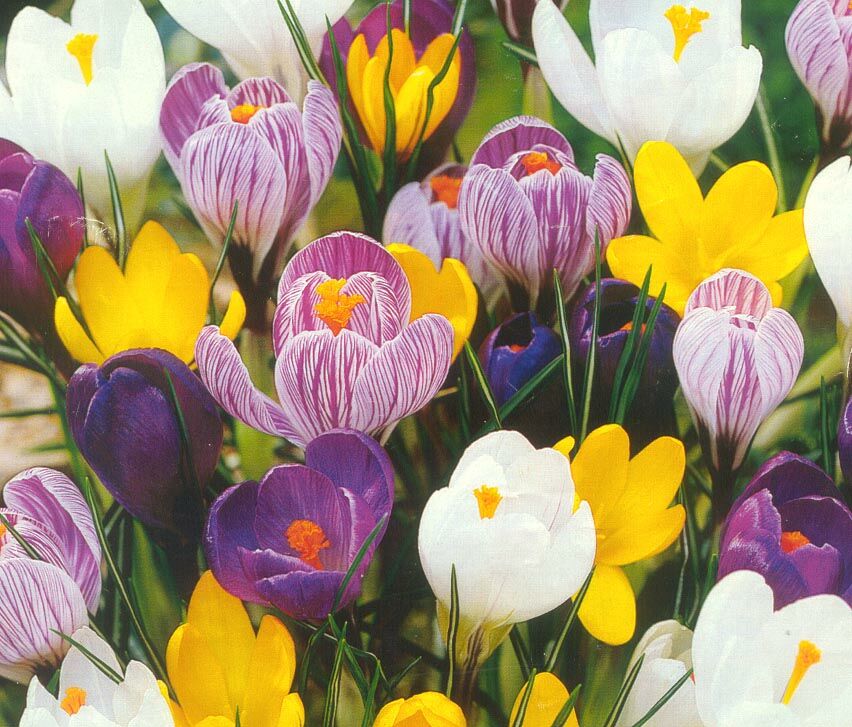
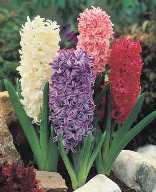
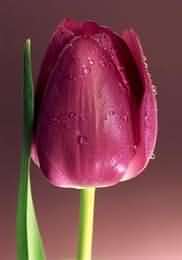
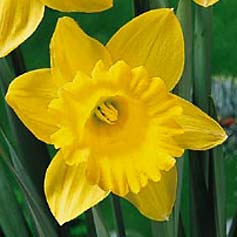
Spring Bulbs
such as daffodils, crocus, tulips, and
hyacinths are planted in the late fall
and early winter months in the south.
You can plant them in large groups or
small clusters, under pansies in pansy
beds, or force them in containers.
Site
Selection - Be sure
the location will provide enough sunlight,
bulbs need at least half a day's exposure.
To be sure of the amount of sun that
hits a particular spot choose the site
after the overhead trees have "
leafed out " providing their shade.
Low tree limbs can be pruned up to allow
more light to flood the site being planted.
NOTE: Planting bulbs under aggressive
ground covers or dense turfgrass is
not recommended.
Landscaping
with Bulbs - Spring-flowering
bulbs are beautiful almost anywhere
in your garden. Use them to accent formal
beds, borders, rock gardens, woodlands,
containers and lawns. By selecting varieties
with different flowering times, you
can have flowers blooming
throughout your landscape beginning
in very early spring and continuing
into the early summer. For the most
dramatic color and impact, plant bulbs
in groups or “drifts.” The
more bulbs you plant in the drift, the
greater
the impact.
Many bulbs are also good for naturalizing,
a planting technique that
results in a natural, informal appearance.
Bulbs that multiply readily - such
as daffodils and crocus - are especially
good for naturalizing. To achieve a
natural effect, scatter the bulbs gently
over your site (woodland border or the
edges of islands) and simply dig them
in where they fall.
CAUTION: When selecting a site for
naturalizing, choose a spot that does
not require mowing in the early spring
because, once flowers fade, it’s
important to let the foliage continue
growing. The foliage feeds the bulb
and then dies back naturally in approximately
three to six weeks. Removing the foliage
prematurely may decrease the bulb size
and flowering in subsequent years.
|
|
Planting
Spring Bulbs In The Ground (Scroll
Further Down for Forcing Bulbs)
Which end is up?
That’s a good question!
Most bulbs have a clearly defined,
tapered tip that should point up when
planted. Some bulbs are more rounded
and have a slightly tapered, “up”
end and a flatter “down”
end that usually shows evidence of
roots. If your bulb does not have
a clear “up” end, follow
the planting instructions printed
on the package label. If in doubt,
we suggest planting irregular-looking
bulbs sideways. |
 |
Tips
for Success
Watering
- After planting, give your plants
a thorough watering. Spring bulbs
planted in fall will usually not
require much watering as the soil
during winter usually retains moisture
for longer periods of time after
rainfall. In spring though, as your
plants are establishing themselves
in your garden, it’s important
to water them regularly if there
is no rainfall. Check the soil moisture
weekly and water as needed. Maintaining
adequate moisture in the soil reduces
stress and promotes long-lasting
blooms.
Fertilizing
- A bulb is a plant’s food
storage system. When planting your
bulbs fertilize with a good bulb
fertilizer and bone meal. Follow
instructions on the package for
proper amount of fertilizer to use.
Be careful not to over-fertilize.
For perennial spring bulbs such
as daffodils and hyacinths, during
the first year of bloom, the bulb
provides the plant with most of
the nutrients it requires. But,
for best results, and to ensure
good blooms the following season,
we recommend supplementing your
soil with a balanced, slow-release
bulb or flower fertilizer such as
Bloom Start. Typically, one application
of fertilizer in the fall is enough
to provide your plants with the
extra nutrients they need to produce
healthy foliage and long-lasting
flowers.
Mulching
- Applying a 2-inch-thick layer
of mulch over your garden beds helps
retain moisture and also to maintain
even soil temperatures.
Follow
up Maintenance
-
As your flowers fade in spring,
remove the spent blooms, but allow
the leaves to continue to grow.
The foliage gathers energy from
the sun, which the plant will use
to form next year’s flowers.
Once the leaves have turned yellow
and dried, you may cut them back.
|
Forcing
Spring Bulbs in Containers
Almost anything that provides drainage
can serve as a container for forcing
spring bulbs. In addition to terra
cotta, plastic and ceramic you can
use barrels, bushel baskets, plastic
tubs, and wooden planter boxes.
The size of container that you
use should be determined by the
number of plants that you will grow
in it. Smaller containers are usually
preferable when forcing bulbs.
Make sure the containers have drainage
holes so excess water can drain
and bulbs won't get waterlogged.
Forcing
Bulbs:
- Select the bulbs you are going
to force. Below is a listing of
bulbs good for forcing, and a
timetable. Use you artistic skills
to mix and match the right blooms
with the right pot.
- Use a good professional potting
soil that drains well.
- Tip: Make up several pots for
a continuous bloom.
- After making the pots, water
thoroughly until water emerges
from the holes at the bottom of
the pots. Let excess water drain
out. NOTE:
Most bulbs require a "chilling
period". This is a time when
the bulb is dormant in a cool
environment, simulating it's natural
underground winter home in cold
soil. Bulbs need this chilling
period to force them to bloom.
A couple exceptions to the rule
are paperwhites and Amaryllis
which do not require a period
of chilling.
- Chill your bulbs by potting
them up and placing the pots in
a cool location. The ideal temperature
for chilling is 40 degrees, keeping
them as close to this temperature
as possible. Do not let the bulbs
freeze.
- Chill your pots for 12 to 15
weeks. This is the minimum period,
but they can be chilled for more.
Different bulbs will require varying
periods for chilling.
- Check on the pots from time
to time. Make sure that the soil
has not dried out. It should be
slightly moist, but not wet. During
this period, your dormant bulbs
are not quite dormant. They are
quietly building their root system
so they are ready to explode out
of the ground when you bring them
indoors.
- Important Tip: While you can
chill bulbs in a refrigerator,
they interact with many fruits
in your refrigerator and will
fail to bloom.
After the minimum chilling period
has been reached, bring your pots
in. Place them in a warm, sunny
window. The warmth is your bulbs'
signal to awaken. As soon as they
emerge from the ground, they will
need light to grow and bloom.
- So, right about now you are
probably wondering about how long
a particular bulb needs to be
chilled and how long the growing
period is to reach the blooming
stage. Well, you guessed the answer...
it depends. It depends upon the
particular bulb.
Tip: To extend the blooms, move
the pots to a cool location at
night and while you are out of
the house.
Bulb
Forcing Timetable
NAME
OF BULB |
WEEKS
OF COLD |
WEEKS
TO BLOOM |
| Amaryllis |
none |
6
to 8 |
| Crocus |
15 |
2-3 |
Eranthis
|
15 |
2 |
| Fritillaria
|
15 |
3 |
Galanthus
|
15 |
2 |
| Hyacinth |
10-12 |
2-3 |
| Muscari |
13-15 |
2-3 |
| Narcissus
(Daffodils) |
15-17 |
2-3 |
| Narciss.
(Paperwhite) |
none |
3-5 |
| Narciss.
orientalis |
none |
3-5 |
| Scilla tubergeniana |
12-15 |
2-3 |
| Scilla siberica
|
15
|
2-3 |
| Tulips |
14-20 |
2-3 |
|
|
|
|
Other
'All About' Pages
Free
Garden Designs
|
|
|
|